How to add, modify, or remove banners using HTML editor
Overview
One of the main benefits of KurocoEdge is that you can make changes to your webpages 'on the edge', without having to make any changes to your site's source code – or even make changes to any content in a CMS you may be using.
This tutorial explains how to easily add, modify, or remove banners using KurocoEdge's HTML editor functionality.
What You'll Learn
Adding a new banner
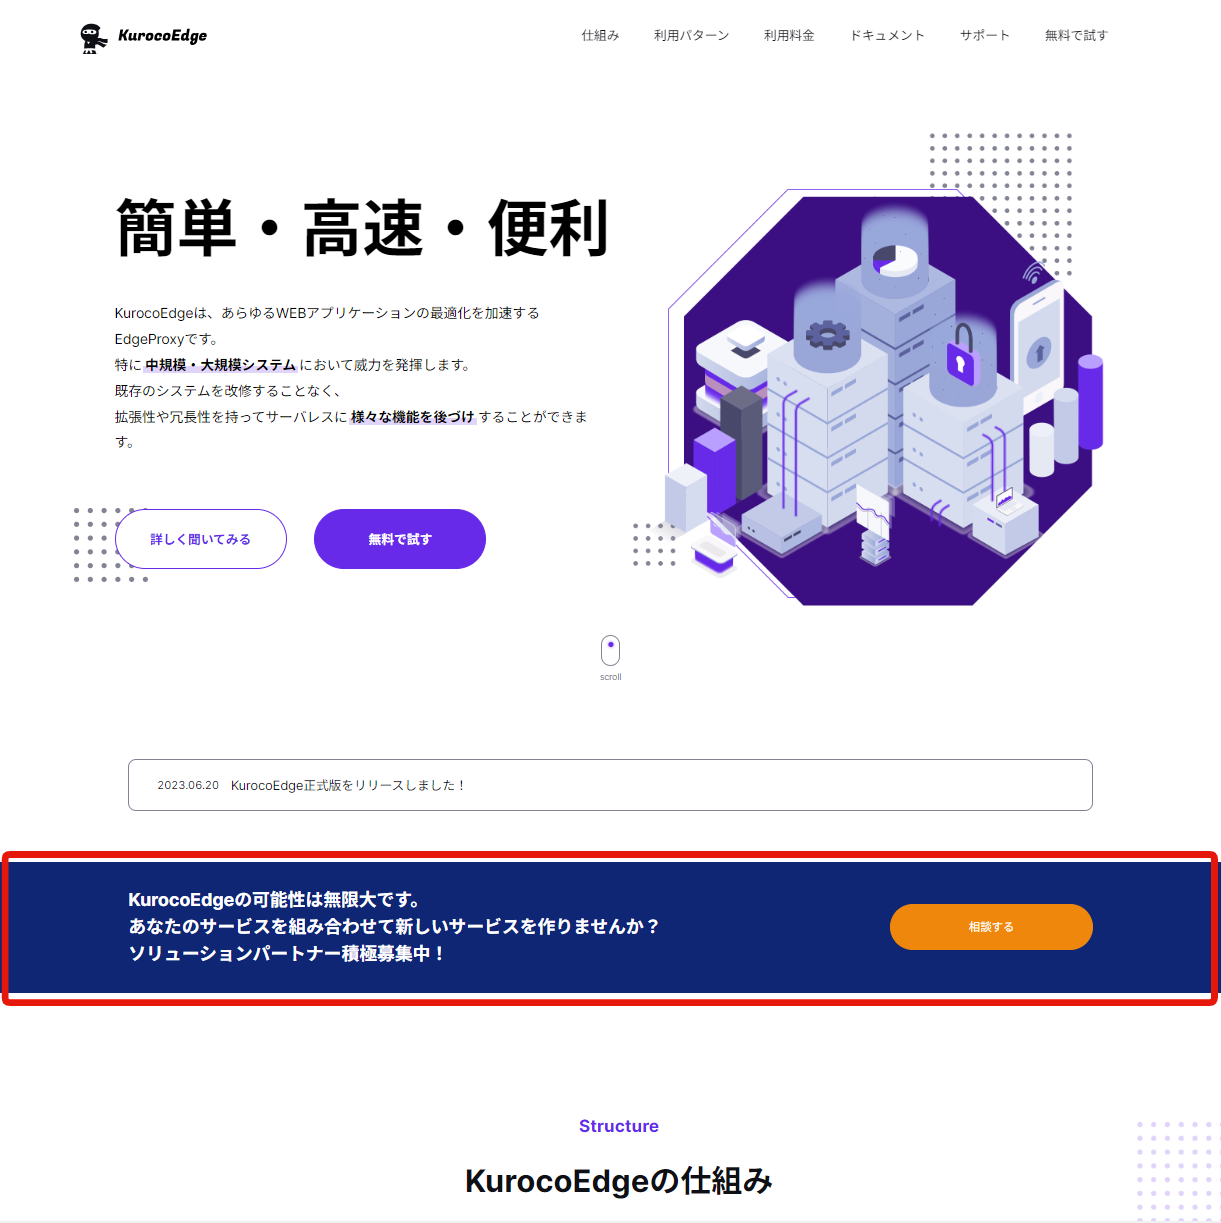
For this exercise, we will be using the KurocoEdge homepage as the default backend.
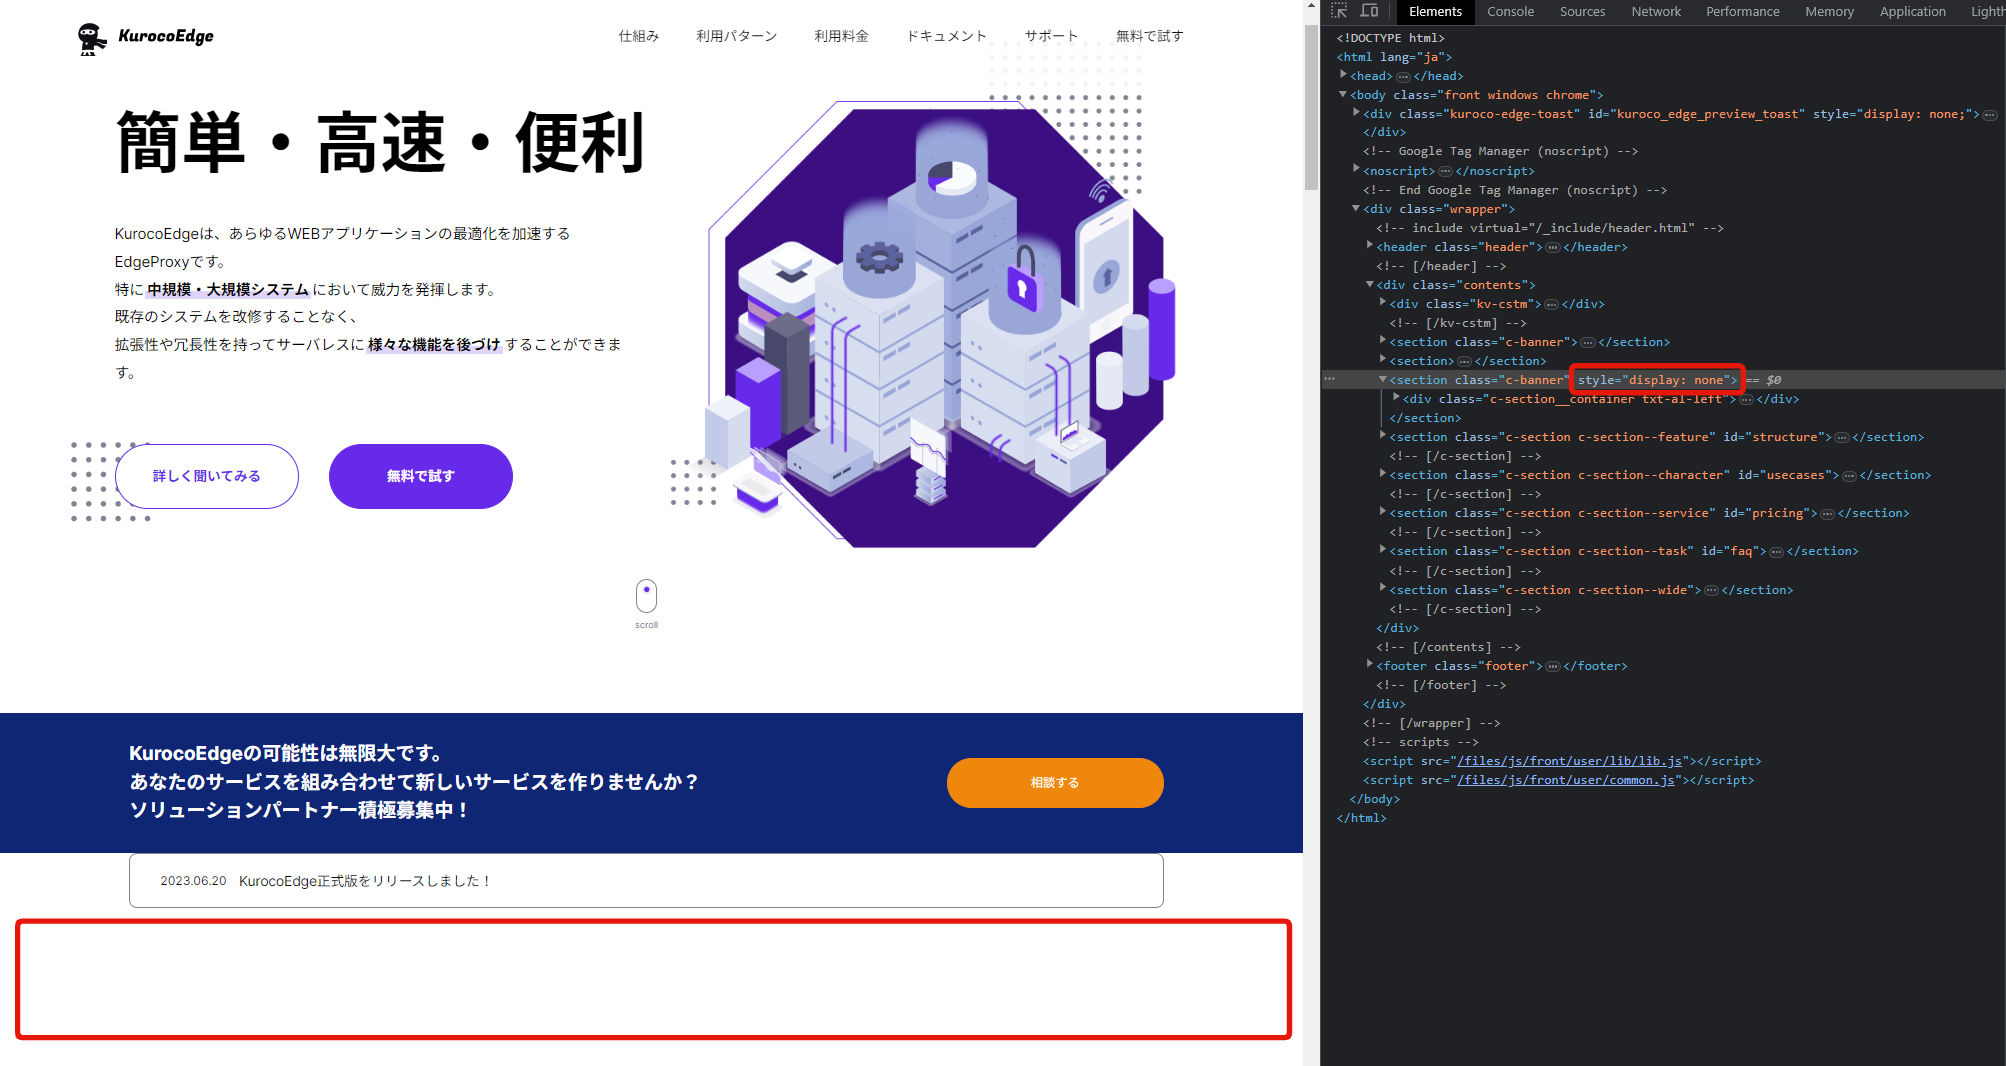
We will be referring to the banner below for this exercise.
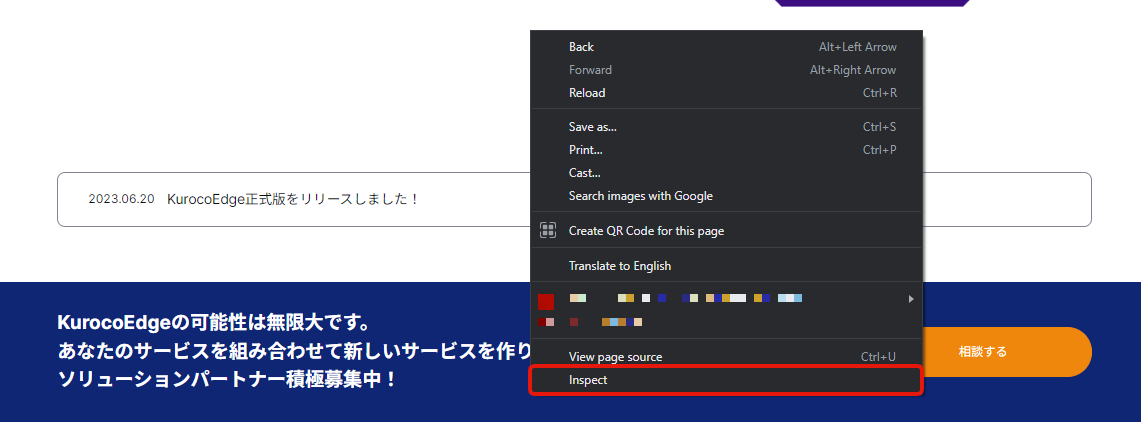
To begin, confirm the banner element by right clicking the banner on your webpage and select the Inspect menu to open the developer tool.
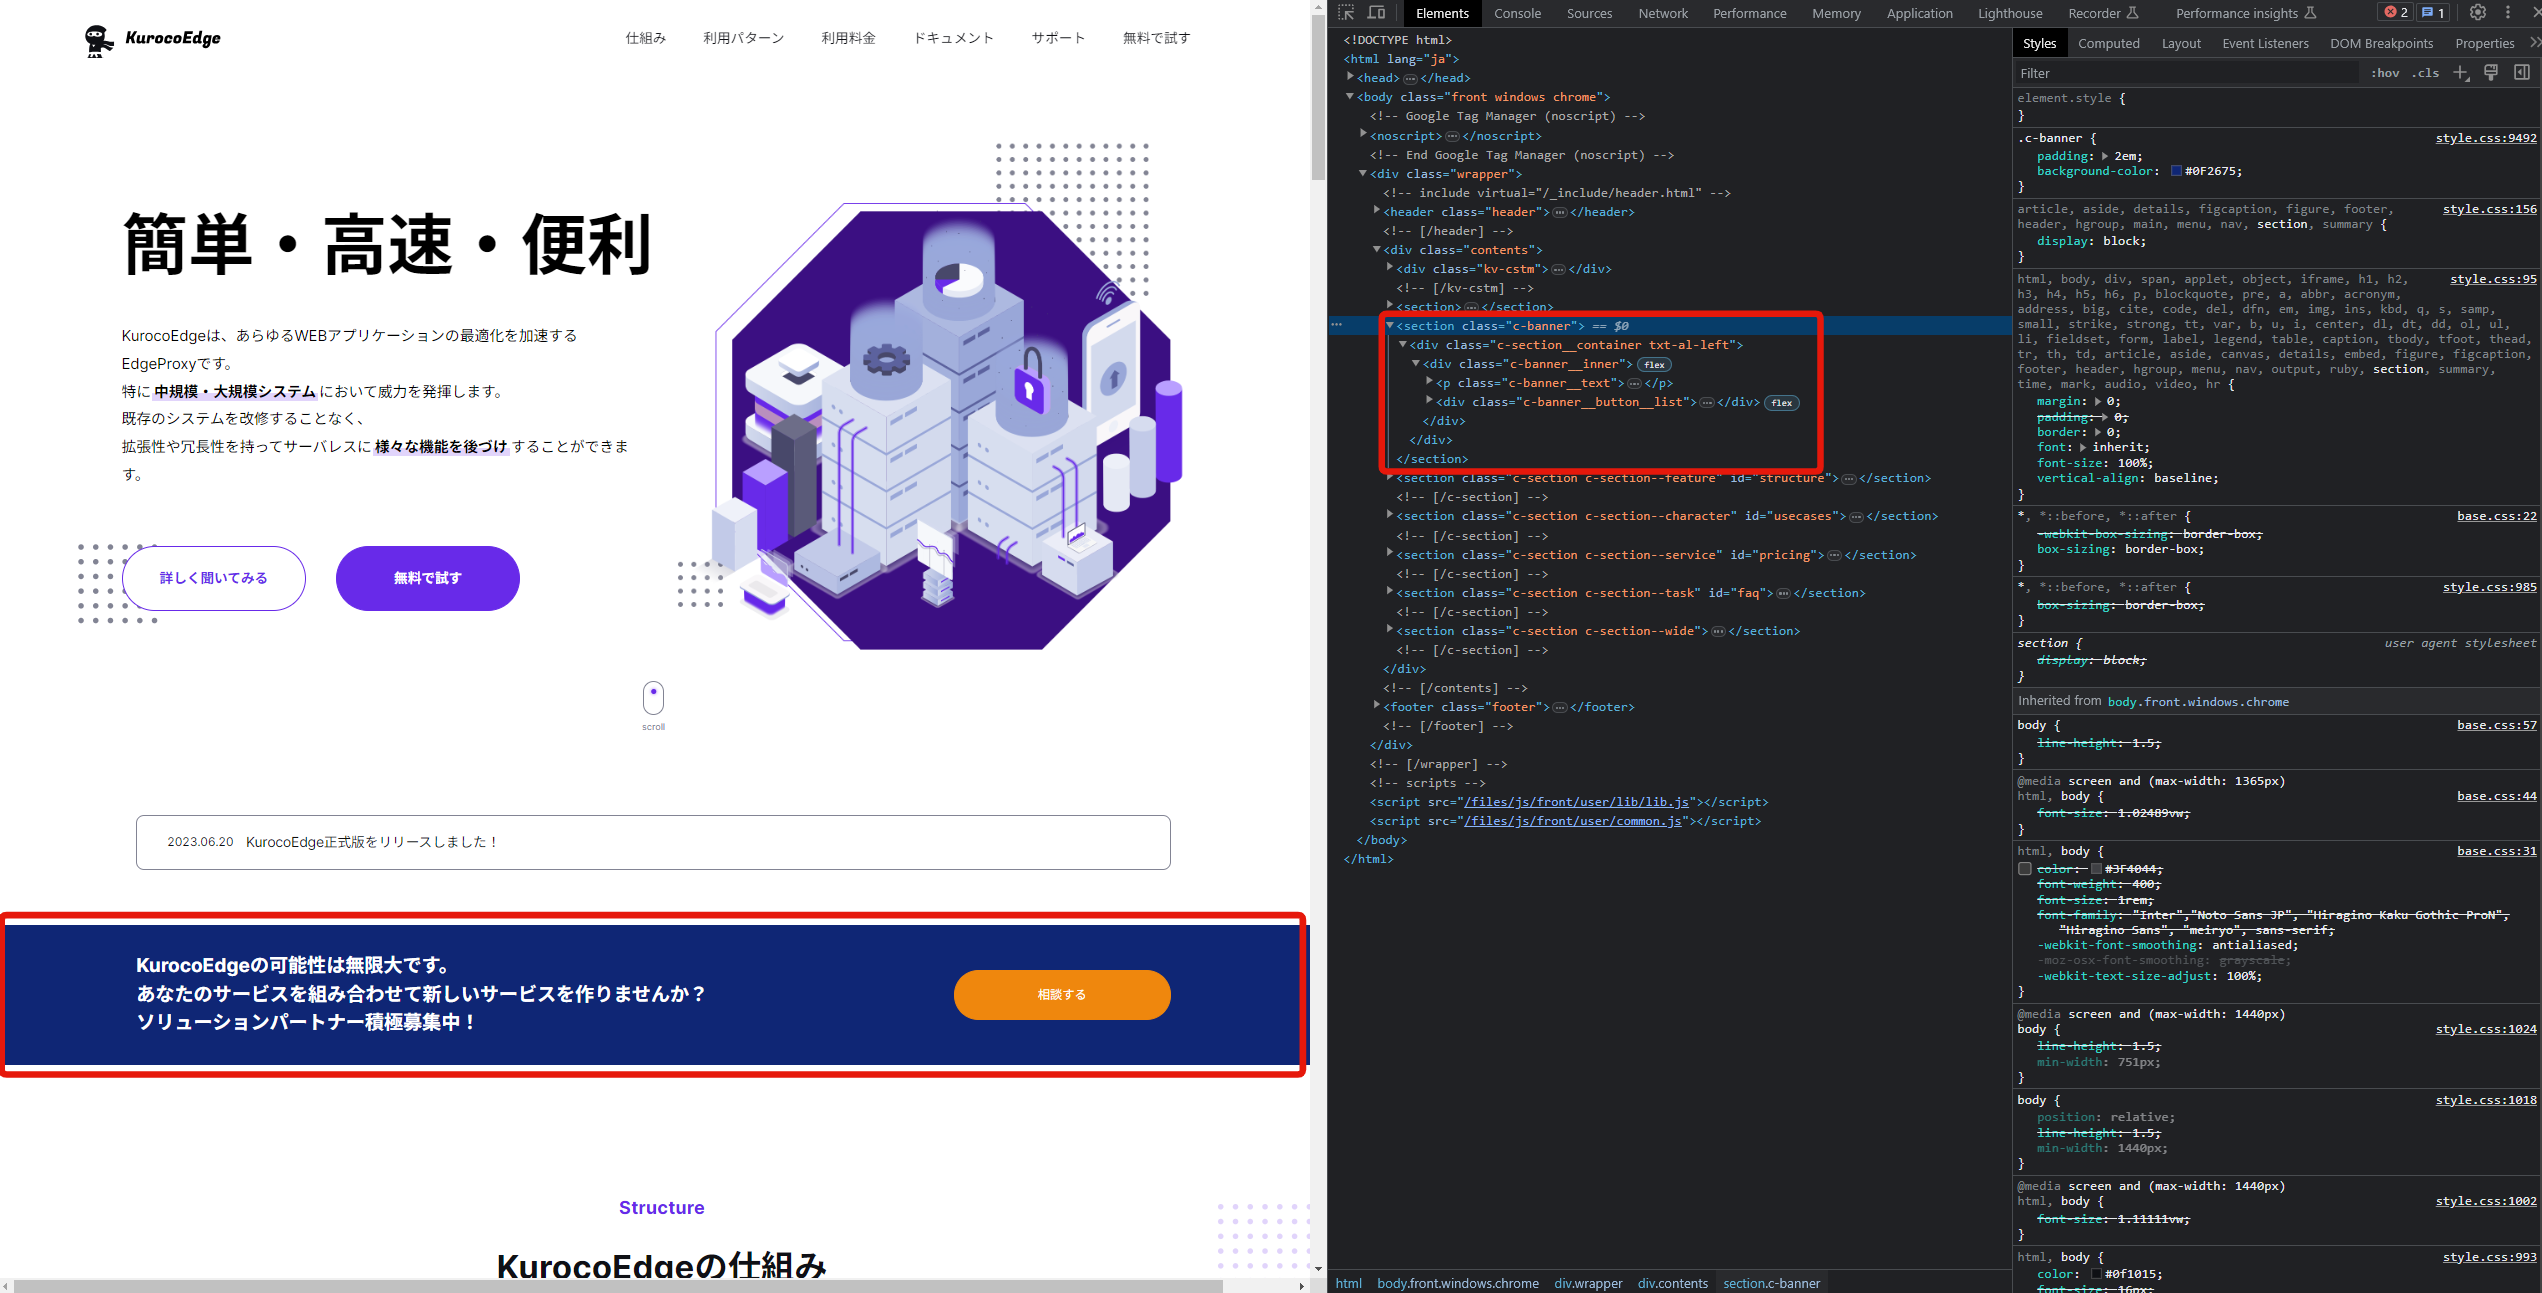
In the developer tool, we can verify the banner's HTML element.
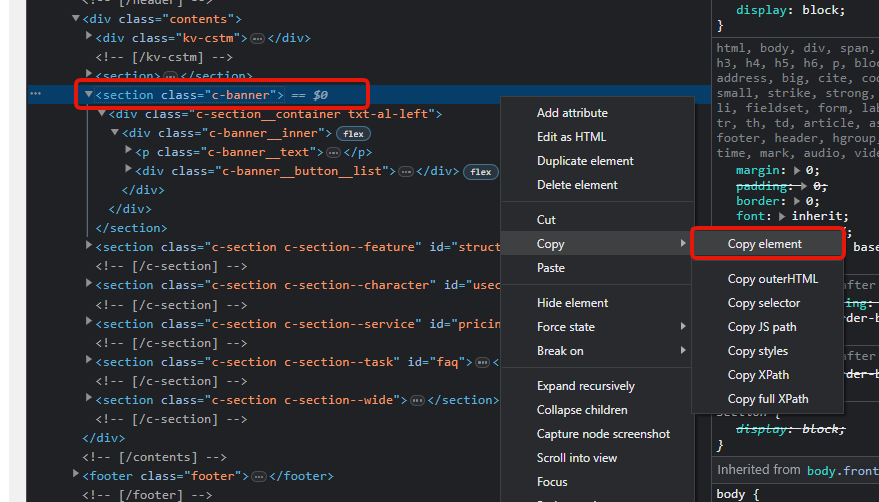
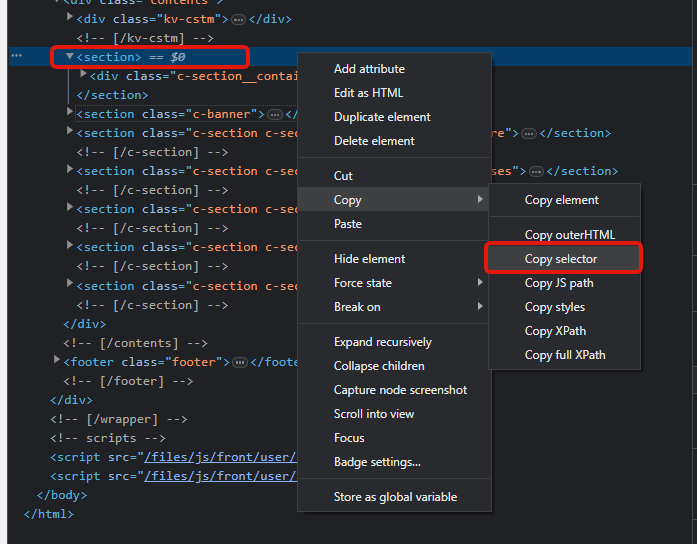
Copy the banner's HTML element by right clicking the element in the developer tool and select Copy > Copy element.
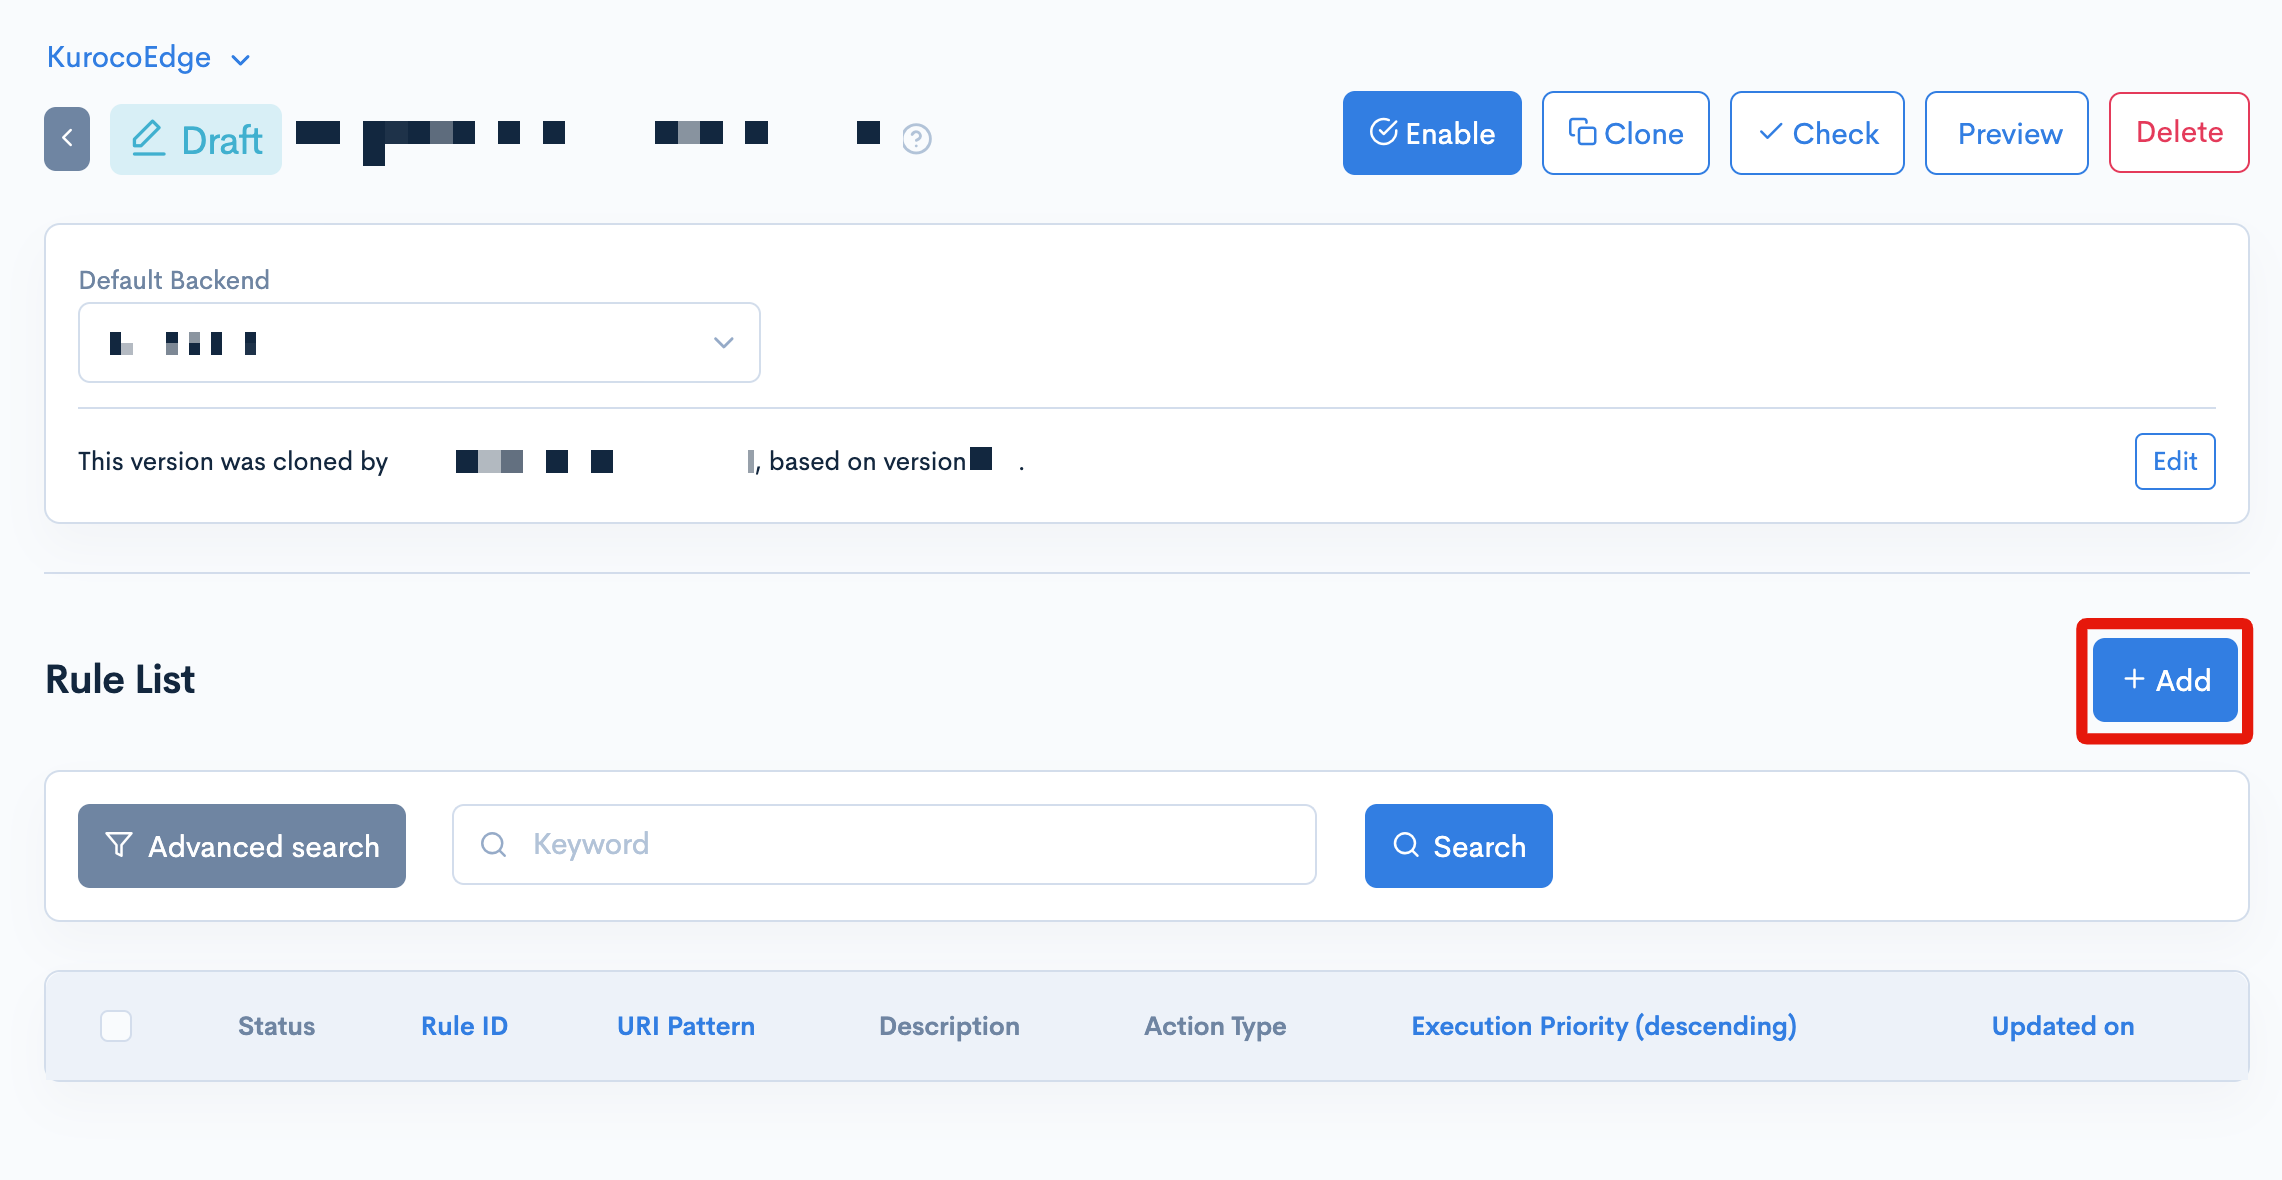
Now that we have copied the HTML element of the banner, we will need to add a rule to add a new banner.
Select a draft deployment and click the Add button to add a new rule.
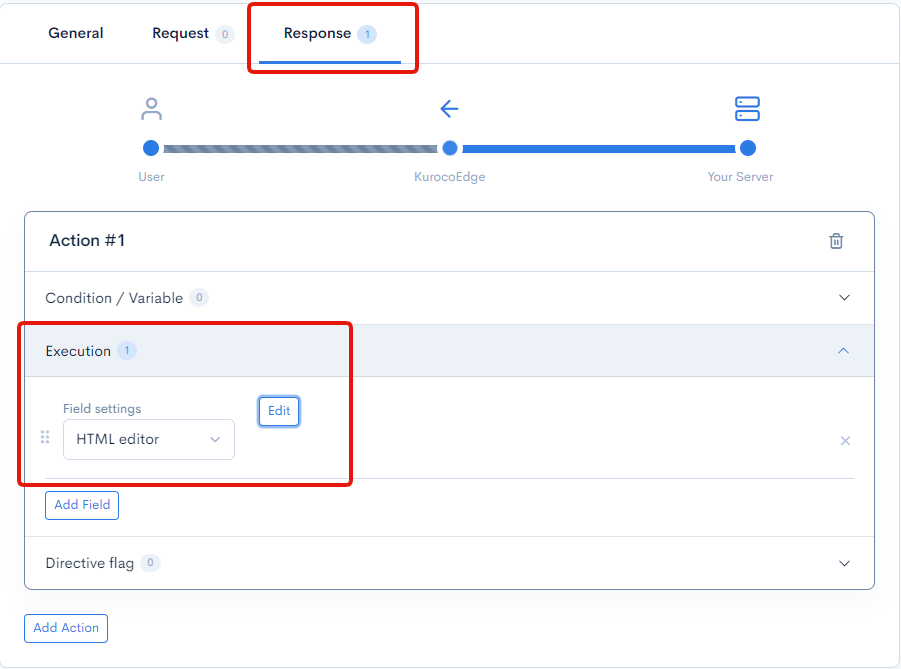
Go to the Response tab and add a HTML editor field in the Execution section.
Click the Edit button of the HTML editor and go to the HTML Injection tab, select Insert before as the inject location and then paste the HTML element code that you have copied earlier into the HTML field.
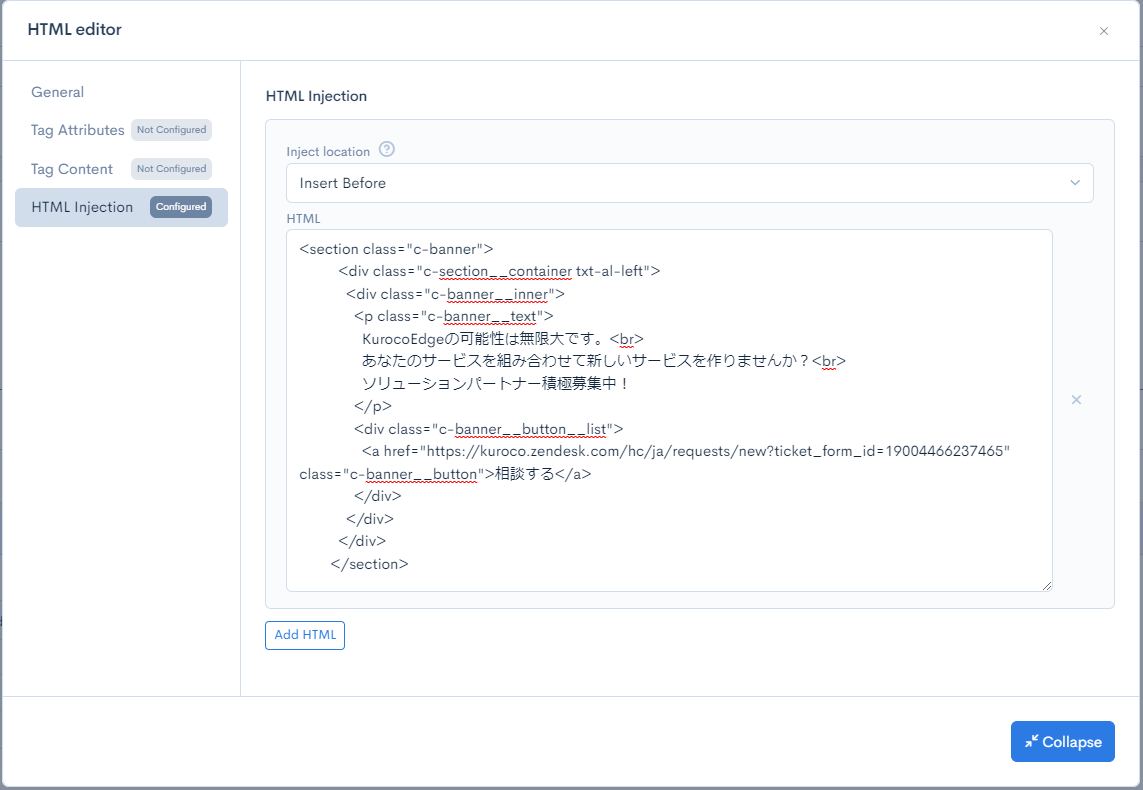
The above settings will insert a new banner element HTML above the CSS selector of our choice.
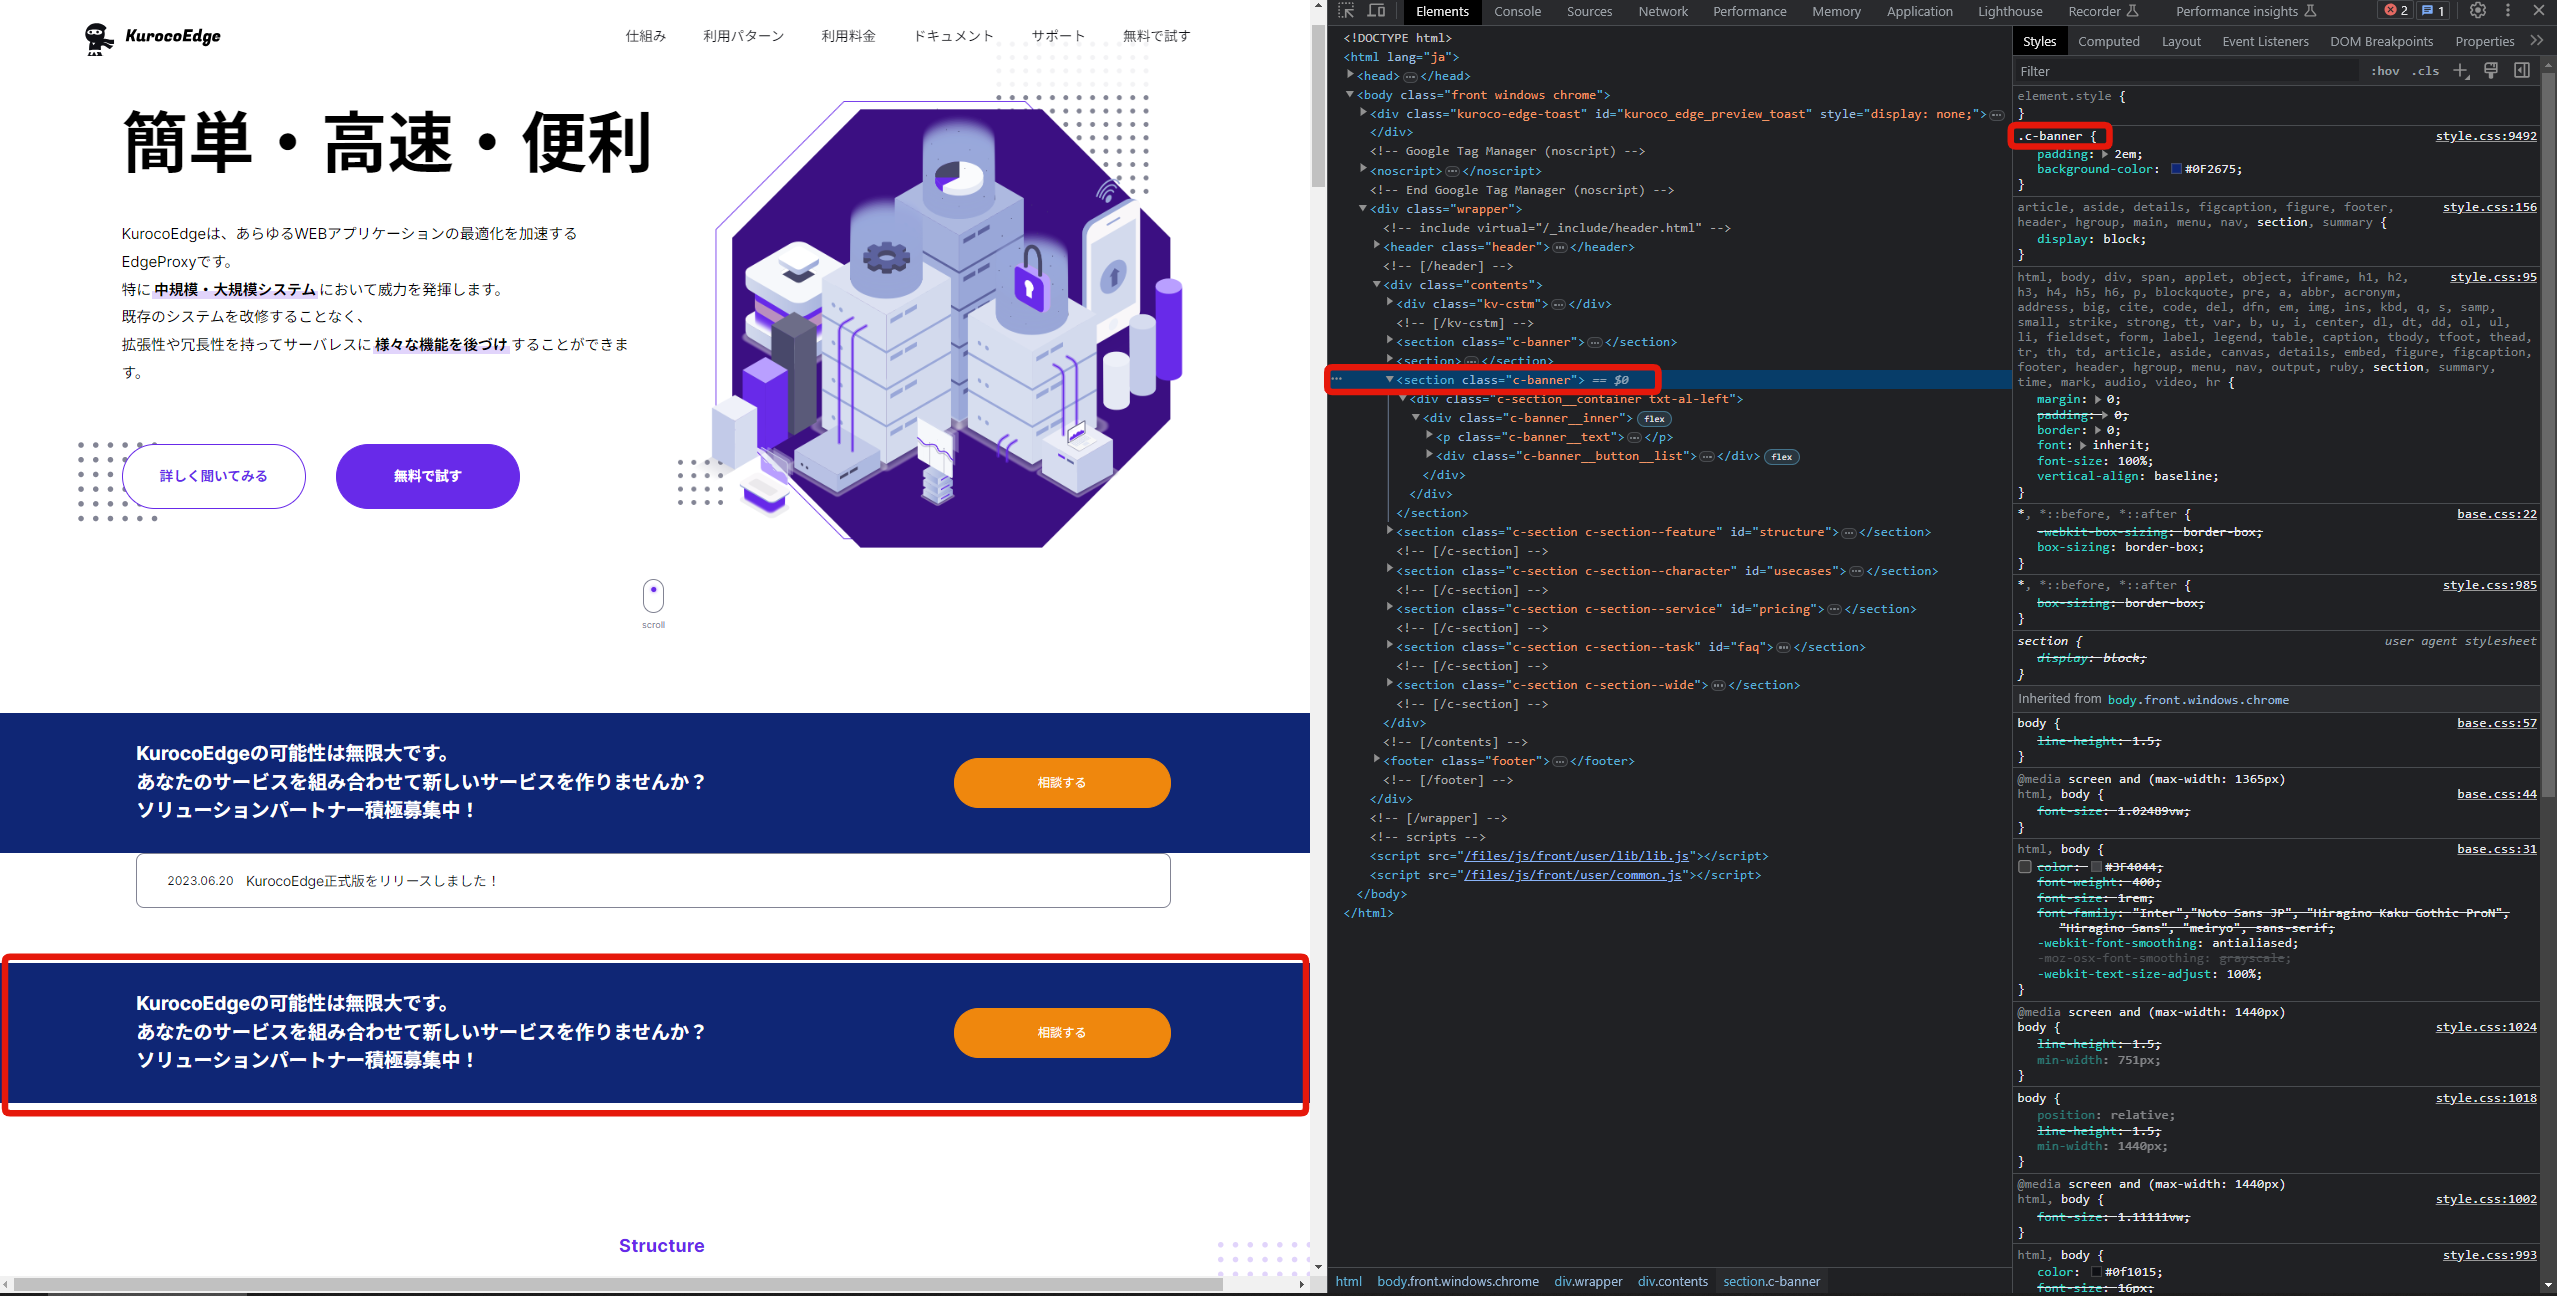
In our case, we will insert the new banner element HTML above the following section highlighted in red.
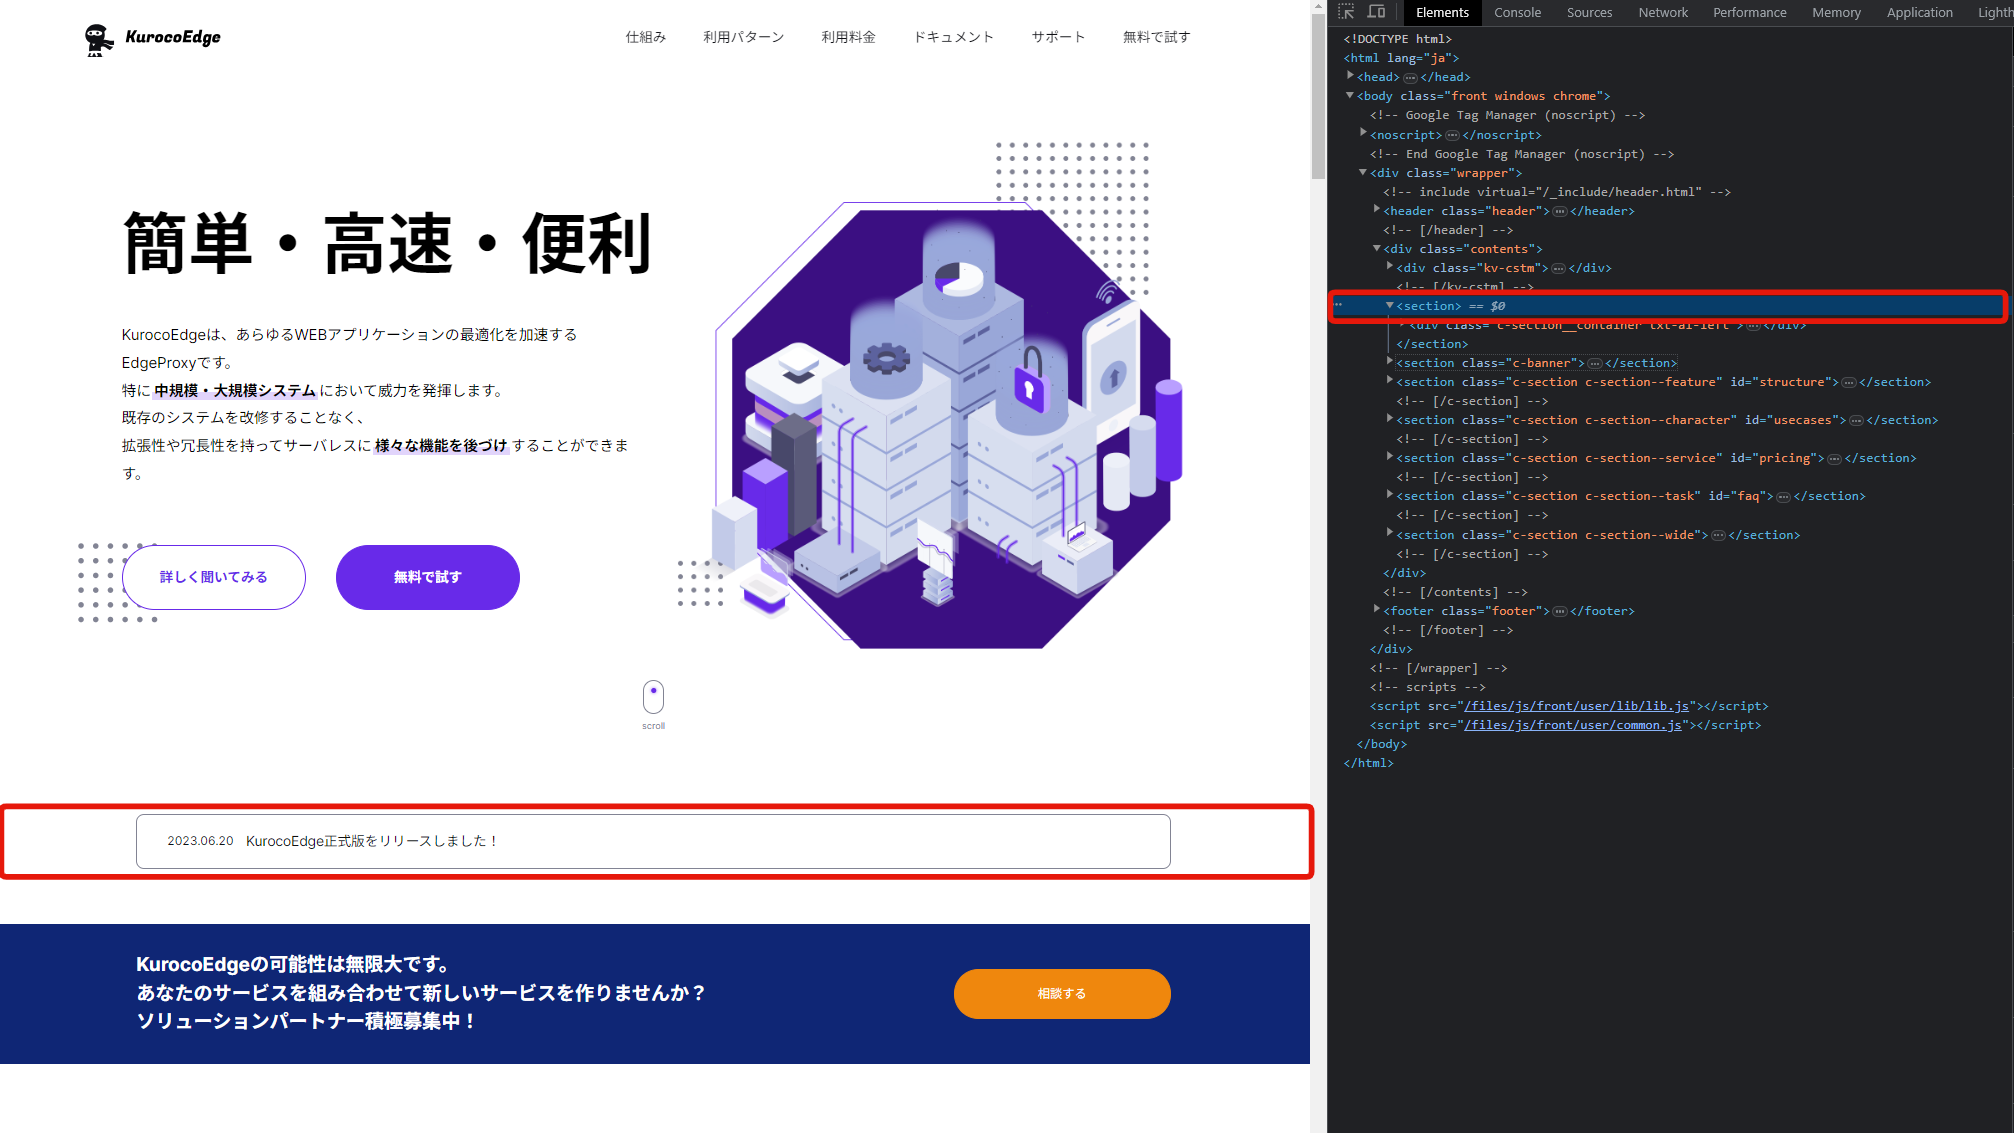
To do this, copy the section's CSS selector by right clicking the element in the developer tool and select Copy > Copy selector.
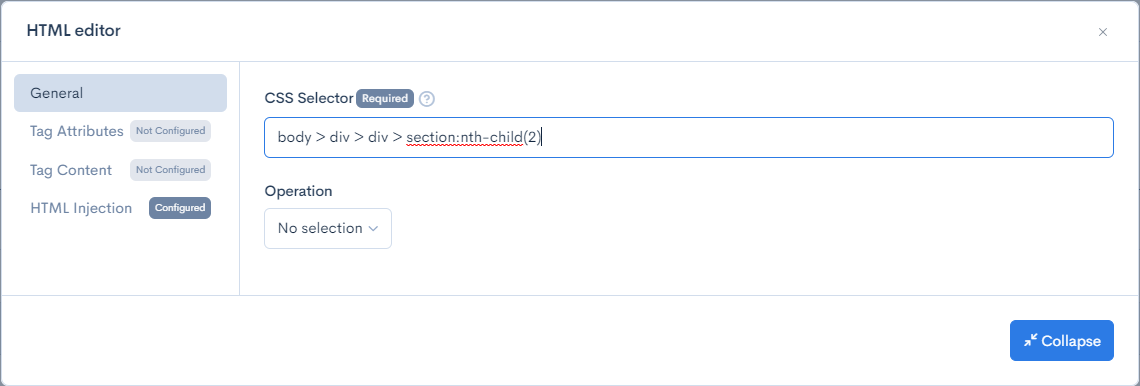
Go back to the KurocoEdge rule, go to the General tab of the HTML editor and paste the CSS selector that you've copied earlier into the CSS Selector field.
Close the HTML editor modal window, click the Update button on the bottom left of the page to save your changes.
Click the Preview button on the top right of the page to preview the rule that you've set up.
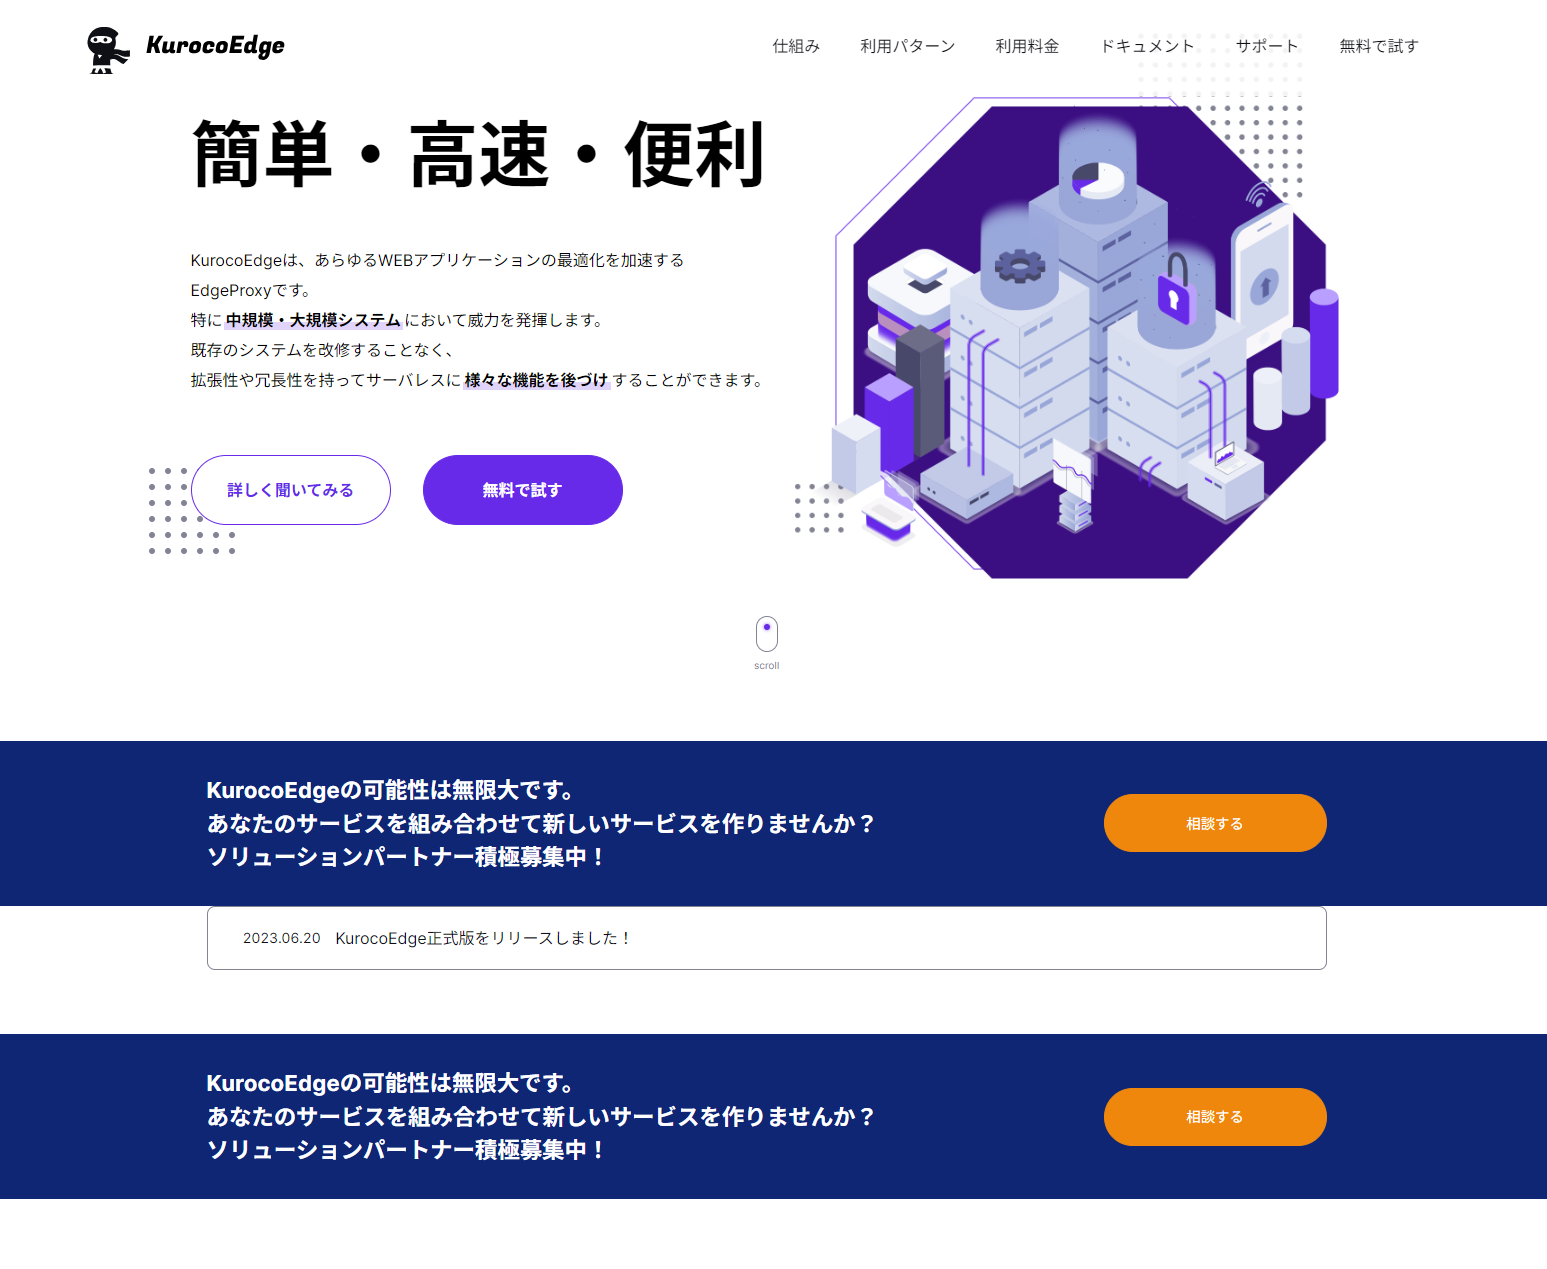
The new banner element should be displayed on your webpage
Modifying an existing banner
Next, we will modify the color of the banner.
We do this by identifying the CSS selector of the banner element, which is .c-banner in this example.
Create a new HTML Editor field in the Execution section for the Response tab with .c-banner as the CSS selector.
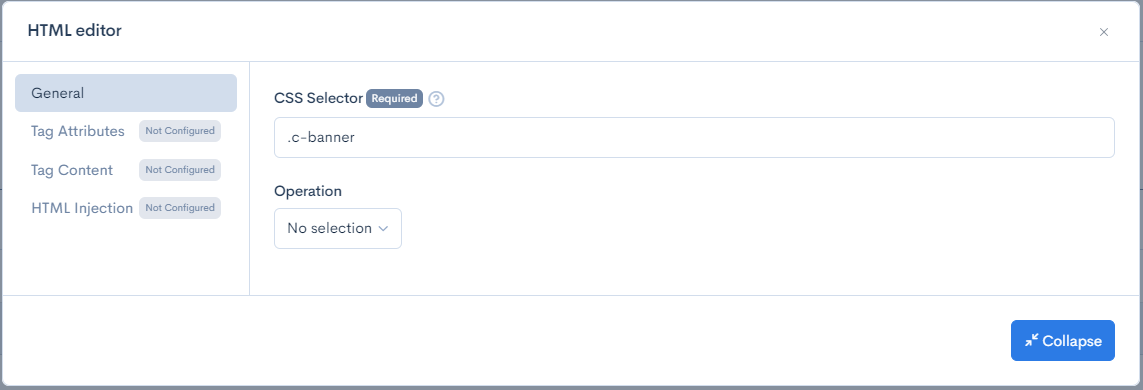
To modify the banner color, select the Tag Attributes tab and enter the following.
| Operation | Attribute Name | Value |
|---|---|---|
| Set | style | background-color: red |
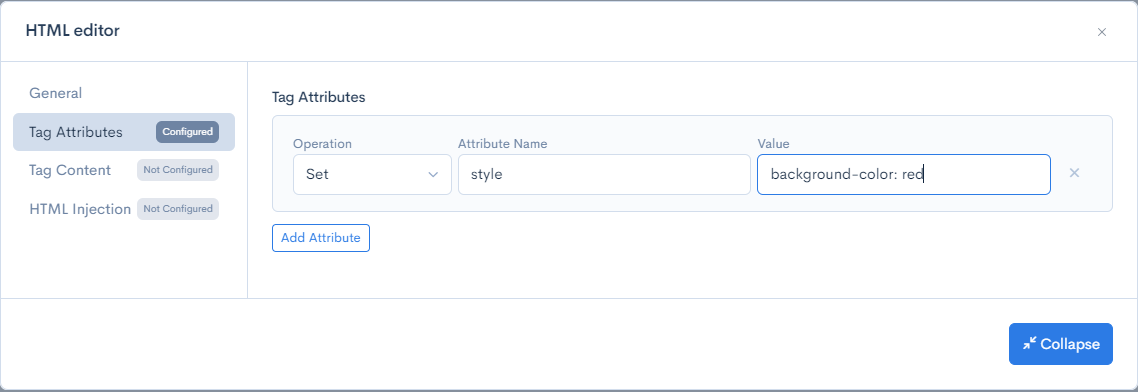
Click Update to save your changes and preview the rule by clicking the Preview button.
You will notice that the original banner's color has changed, while the banner added using KurocoEdge still remain the same color.
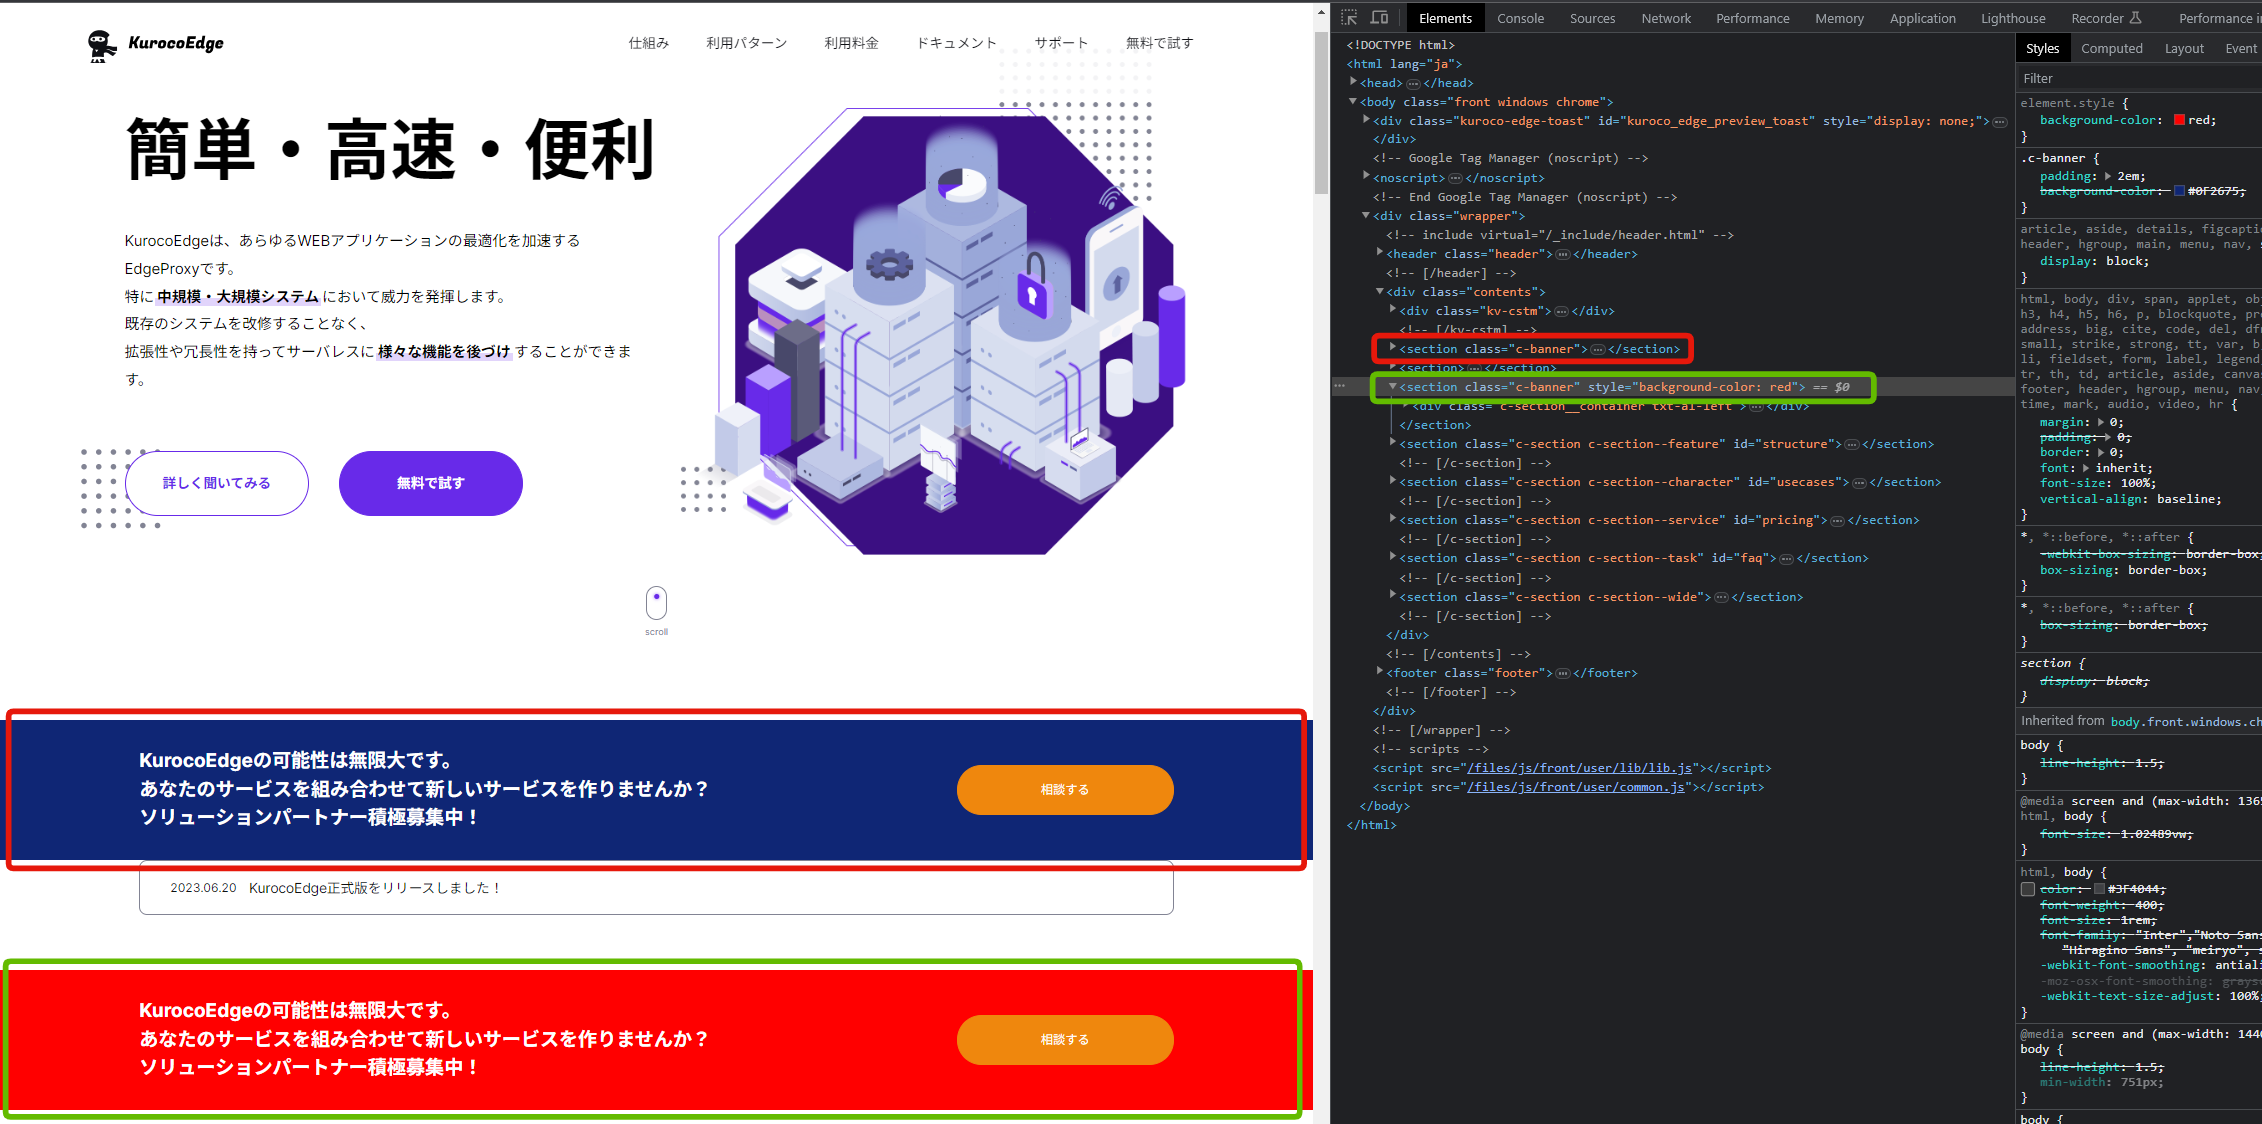
This is because this new rule overrides and sets the style of the background-color to red, while the banner added via KurocoEdge is injecting the HTML code that you've previously copied which does not contain any style settings.
You can learn more about how rules affect each other by referring to the Rule execution priority documentation.
Removing or hiding a banner
Finally, we can hide or delete a banner using the following options in the HTML Editor.
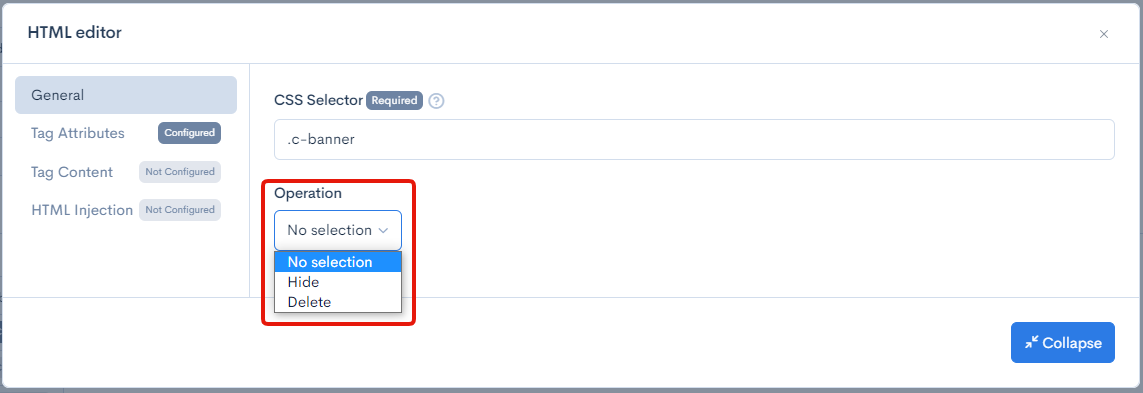
If Hide option is selected, the element will be hidden from the webpage, but the HTML code will remain and be visible in the developer tool.
The Hide option sets the element's style to display:none, this does not work in conjunction with HTML editor that also make modification to the element's style. If the element's style is being modified by the HTML editor and the Hide option is enabled, only one of the 2 settings would take into effect, therefore, if you would like to hide an element that already has custom style modification, then you should add the display:none tag to the style of the element by setting it in the Tag Attributes tab of the HTML editor.
If Delete option is selected, the element will be removed entirely from the webpage, including the HTML code.
Summary
In this tutorial, you have learned how to identify the HTML element of your banner, add a new banner, modify banner properties, and remove or hide banners using KurocoEdge.
Support
If you have any other questions, please contact us or check out Our Discord Community.